踩坑 Nginx + Unicorn。
写在前面
之前用过Nginx + Passengers来部署Rails 应用, 这次换Nginx + Unicorn部署了Rails App,过程虽有些波折,但结果还是蛮赞的。【其实折腾了大半天,最后终于重新从坑里爬出来了,还多亏老大帮忙看了下……】
下面以一个简单的rails项目的部署为例,来感受下Nginx + Unicorn。
【如果你也和我一样是枚小白,补充下,这里,Unicorn是一个HTTP server,类似Passenger或者puma。由于Unicorn不能直接被用户访问,使用Nginx作为反向代理,来缓冲用户与Rails应用之间的请求与响应。】
正文
1、准备Rails App
本地新建一个rails项目recipes
rails new recipes
cd recipes
git init
git add .
git commit -m "new project recipes"
# 将recipes托管到第三方代码库,这里选GitHub
git remote add origin https://github.com/XXXXX/recipes.git
git push -u origin master
rails g scaffold topic title:string description:text
rake db:migrate
git add .
git commit -m "create topic model"
rails s
修改
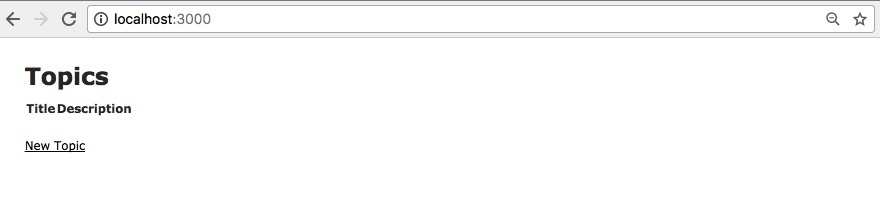
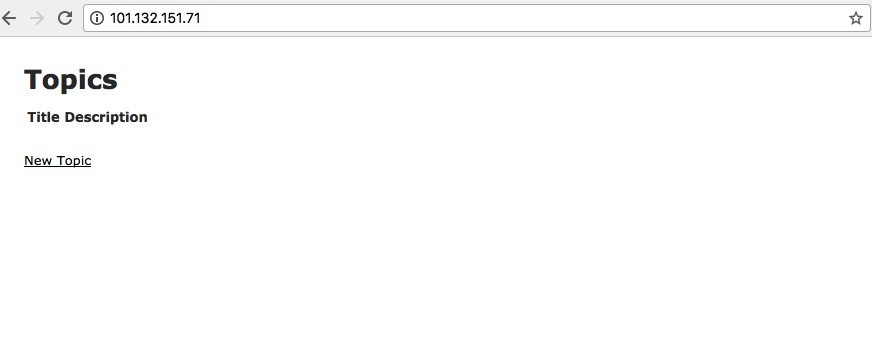
config/routes.rb,把主页设定成topic的index, 添加root "topics#index":Rails.application.routes.draw do resources :topics + root "topics#index" end这时,在浏览器打开http://localhost:3000/,画风是这样的:
git add .
git commit -m "update routes"
git push
添加gem: unicorn, foreman, dotenv-rails
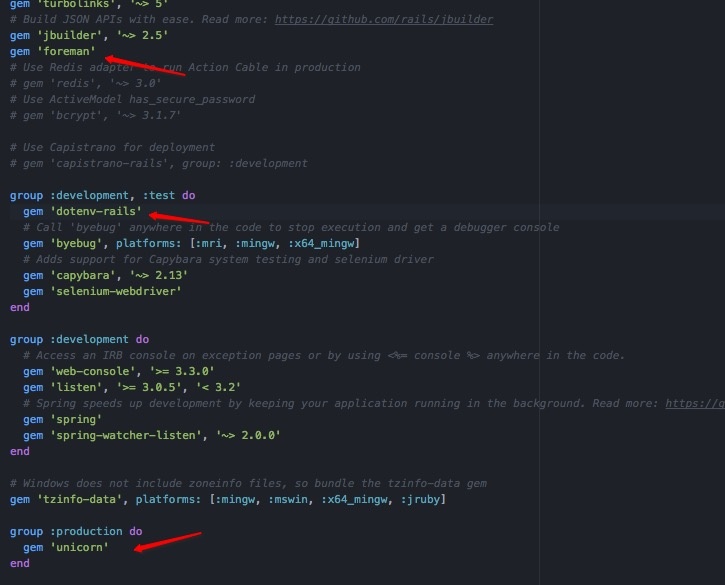
终端运行:
bundler install添加
config/deploy.rb, 内容如下: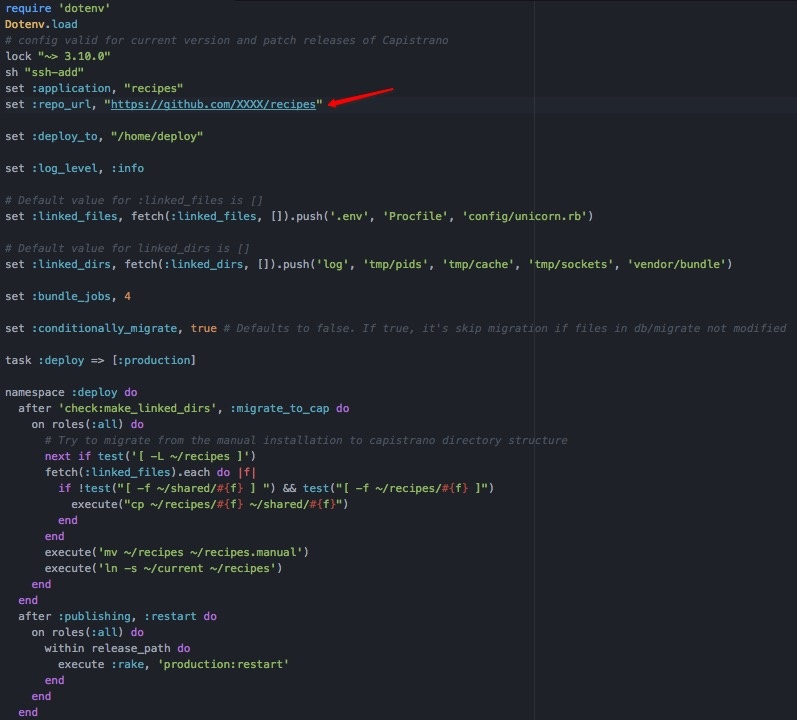
【repo_url 换成你自己的URL】
根目录下添加Procfile 文件,内容如下:
git add .
git commit -m "add unicorn to project"
git push
将所有进度push至remote, 好,我们开始部署!
2、安装套件
这里以Ubuntu16.04为例,假定你已经添加一个免密登陆的用户deploy,我们将项目部署在home/deploy下。
登陆服务器,更新,升级:
sudo apt-get update -y
sudo apt-get upgrade -y
裝套件,这些是Ruby on Rails 需要的:
sudo apt-get install -y build-essential git-core bison openssl libreadline6-dev curl zlib1g zlib1g-dev libssl-dev libyaml-dev libsqlite3-0 libsqlite3-dev sqlite3 autoconf libc6-dev libpcre3-dev libcurl4-nss-dev libxml2-dev libxslt-dev imagemagick nodejs libffi-dev如果安装的nodejs版本低,尝试这样:
#nodejs v9
curl -sL https://deb.nodesource.com/setup_9.x | sudo -E bash -
sudo apt-get install -y nodejs
裝Ruby
检查版本:
ruby --version如果有旧的版本,比如1.8/1.9, 卸载掉:
sudo apt-get remove -y ruby1.8 ruby1.9下载,解压,编译,安装:
mkdir /tmp/ruby && cd /tmp/ruby wget https://cache.ruby-lang.org/pub/ruby/ruby-2.4.0.tar.gz tar -xzvf ruby-2.4.0.tar.gz cd ruby-2.4.0/ ./configure --prefix=/usr make sudo make install ruby -v # 处理SSL问题,加入国内gems镜像 gem sources --add http://gems.ruby-china.org/ --remove https://rubygems.org/ # 如果报错:uninitialized constant Gem::RemoteFetcher::Zlib, 则执行:sudo apt-get install zlib1g-dev gem sources -l sudo gem install bundler --no-ri --no-rdoc --source https://gems.ruby-china.org戳这里pub ruby 查看ruby最新版本。
装 foreman gems:
sudo gem install rake bundler foreman --no-ri --no-rdoc装runit:
sudo apt-get install runit裝SQL:
sudo apt-get install mysql-common mysql-client libmysqlclient-dev mysql-server执行过程中会让你配置一个数据库的 root 密码, 记下来,设定rails的数据库时会用到。
建新的数据库:
执行
mysql -u root -p进入console, 输入:CREATE DATABASE recipes CHARACTER SET utf8mb4;创建user deploy,并给user分配数据库 recipes的权限, 把$password 替换成你自己设置的密码:
CREATE USER 'deploy'@'localhost' IDENTIFIED BY '$password';
GRANT SELECT, INSERT, UPDATE, DELETE, CREATE, DROP, INDEX, ALTER, LOCK TABLES ON `recipes`.* TO 'deploy'@'localhost';
exit
退出SQL的session后,尝试连接一下数据库:
sudo mysql -u deploy -p -D recipes这时会让你输入密码,输入刚刚替换$password的密码即可。
3、部署项目
clone项目到服务器
deploy身份登陆,执行:
sudo git clone //github.com/XXXXX/recipes.git recipes
cd recipes
ls -la
如果recipes下面文件的owner不是deploy,执行:
sudo chown deploy:deploy . -R确保deploy对recipes下的文件拥有读写权限,不然后面部署时会失败。
配置文件:
sudo mkdir -p log tmp/pids tmp/sockets
sudo chown -R deploy log/ tmp/
sudo chmod -R u+rwX,go-w log/ tmp/
sudo chmod -R u+rwX,go-w log/
sudo chmod -R u+rwX tmp/
touch .env
touch config/unicorn.rb
配置.env:
# ==== Required configuration settings  ====

# Replace the following with the output from "rake secret"
APP_SECRET_TOKEN=REPLACE_ME_NOW!

############################
#      Database Setup      #
############################

DATABASE_ADAPTER=mysql2
DATABASE_ENCODING=utf8
DATABASE_RECONNECT=true
DATABASE_NAME=recipes
DATABASE_POOL=20
DATABASE_USERNAME=deploy
DATABASE_PASSWORD="your_password"
#DATABASE_HOST=your-domain-here.com
#DATABASE_PORT=3306
#DATABASE_SOCKET=/tmp/mysql.sock

# MySQL only: If you are running a MySQL server >=5.5.3, you should
# set DATABASE_ENCODING to utf8mb4 instead of utf8 so that the
# database can hold 4-byte UTF-8 characters like emoji.
#DATABASE_ENCODING=utf8mb4

# ==== Additional required production settings ====

# Configure Rails environment.  This should only be needed in production and may cause errors in development.
RAILS_ENV=production

# Should Rails force all requests to use SSL?
FORCE_SSL=false
# 设置SECRET_KEY_BASE,config/secrets.yml中有用到,用development的secret_key_base即可
SECRET_KEY_BASE= your_devlopment_secret_key_base
配置
config/unicorn.rb:wd = File.expand_path(File.join(File.dirname(__FILE__), '..')) app_path = wd worker_processes 2 preload_app true timeout 180 listen "#{wd}/tmp/sockets/unicorn.socket" working_directory app_path rails_env = ENV['RAILS_ENV'] || 'production' # Log everything to one file stderr_path "log/unicorn.log" stdout_path "log/unicorn.log" # Set master PID location pid "#{wd}/tmp/pids/unicorn.pid" before_fork do |server, worker| ActiveRecord::Base.connection.disconnect! old_pid = "#{server.config[:pid]}.oldbin" if File.exist?(old_pid) && server.pid != old_pid begin Process.kill("QUIT", File.read(old_pid).to_i) rescue Errno::ENOENT, Errno::ESRCH # someone else did our job for us end end end after_fork do |server, worker| ActiveRecord::Base.establish_connection end安装gems:
sudo bundle install --deployment --without development testmigrate 数据库:
sudo bundle exec rake db:migrate RAILS_ENV=production编译assets:
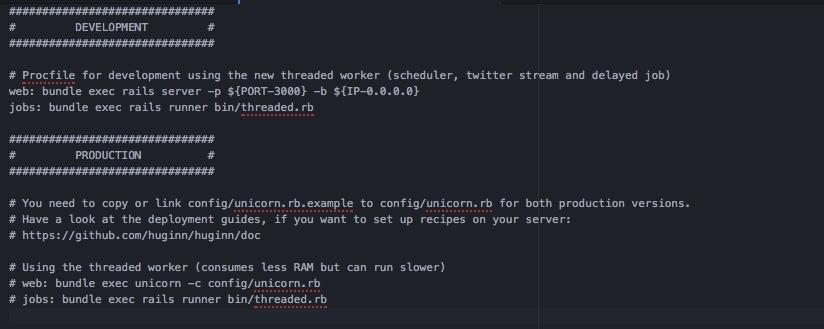
sudo bundle exec rake assets:precompile RAILS_ENV=production修改Procfile:
sudo vi Procfile注释掉Procfile这两行:
web: bundle exec rails server -p ${PORT-3000} -b ${IP-0.0.0.0}
jobs: bundle exec rails runner bin/threaded.rb
同时取消对Procfile这两行的注释:
# web: bundle exec unicorn -c config/unicorn.rb
# jobs: bundle exec rails runner bin/threaded.rb
创建Unicorn的初始脚本:
终端输入:
sudo vi /etc/init.d/unicorn_recipes然后在文件中放入以下内容:
#!/bin/sh

### BEGIN INIT INFO
# Provides:          unicorn
# Required-Start:    $all
# Required-Stop:     $all
# Default-Start:     2 3 4 5
# Default-Stop:      0 1 6
# Short-Description: starts the unicorn app server
# Description:       starts unicorn using start-stop-daemon
### END INIT INFO

set -e

USAGE="Usage: $0 <start|stop|restart|upgrade|rotate|force-stop>"

# app settings
USER="deploy"
APP_NAME="recipes"
APP_ROOT="/home/$USER/$APP_NAME"
ENV="production"

# environment settings
PATH="/home/$USER/.rbenv/shims:/home/$USER/.rbenv/bin:$PATH"
CMD="cd $APP_ROOT && bundle exec unicorn -c config/unicorn.rb -E $ENV -D"
PID="$APP_ROOT/tmp/pids/unicorn.pid"
OLD_PID="$PID.oldbin"

# make sure the app exists
cd $APP_ROOT || exit 1

sig () {
  test -s "$PID" && kill -$1 `cat $PID`
}

oldsig () {
  test -s $OLD_PID && kill -$1 `cat $OLD_PID`
}

case $1 in
  start)
    sig 0 && echo >&2 "Already running" && exit 0
    echo "Starting $APP_NAME"
    su - $USER -c "$CMD"
    ;;
  stop)
    echo "Stopping $APP_NAME"
    sig QUIT && exit 0
    echo >&2 "Not running"
    ;;
  force-stop)
    echo "Force stopping $APP_NAME"
    sig TERM && exit 0
    echo >&2 "Not running"
    ;;
  restart|reload|upgrade)
    sig USR2 && echo "reloaded $APP_NAME" && exit 0
    echo >&2 "Couldn't reload, starting '$CMD' instead"
    $CMD
    ;;
  rotate)
    sig USR1 && echo rotated logs OK && exit 0
    echo >&2 "Couldn't rotate logs" && exit 1
    ;;
  *)
    echo >&2 $USAGE
    exit 1
    ;;
esac
更改权限,并设置可以在boot上启动:
sudo chmod 755 /etc/init.d/unicorn_recipes
sudo update-rc.d unicorn_recipes defaults
开启:
sudo /etc/init.d/unicorn_recipes start检查unicorn的状态:
sudo service unicorn status设置logrotate:
sudo vi /etc/logrotate.d/recipes内容如下:
/home/deploy/recipes/log/*.log {
  daily
  missingok
  rotate 180
  # must use with delaycompress below
  compress
  dateext

  # this is important if using "compress" since we need to call
  # the "lastaction" script below before compressing:
  delaycompress

  # note the lack of the evil "copytruncate" option in this
  # config.  Unicorn supports the USR1 signal and we send it
  # as our "lastaction" action:
  lastaction
    pid=/home/deploy/recipes/tmp/pids/unicorn.pid
    test -s $pid && kill -USR1 "$(cat $pid)"
  endscript
}
如果提示readonly, 无法写入,使用chmod或者chown来获取读写权限。
安装Ngnix
sudo apt-get install -y nginx查看版本:
nginx -v在/etc/nginx/sites-available下,新增recipes文件:
sudo vi /etc/nginx/sites-available/recipes内容如下:
###################################
##         configuration         ##
###################################
##
## See installation.md#using-https for additional HTTPS configuration details.

upstream recipes {
  server unix:/home/deploy/recipes/tmp/sockets/unicorn.socket fail_timeout=0;
}

## Normal HTTP host
server {
  listen 0.0.0.0:80 default_server;
  listen [::]:80 ipv6only=on default_server;
  server_name 101.132.151.71; ## 这里填域名,如果没有,填服务器 IP 位置
  server_tokens off; ## Don't show the nginx version number, a security best practice
  root /home/deploy/recipes/public;

  ## Increase this if you want to upload large attachments
  client_max_body_size 20m;

  ## Individual nginx logs for vhost
  access_log  /var/log/nginx/recipes_access.log;
  error_log   /var/log/nginx/recipes_error.log;

  location / {
    ## Serve static files from defined root folder.
    ## @huginn is a named location for the upstream fallback, see below.
    try_files $uri $uri/index.html $uri.html @recipes;
  }

  ## If a file, which is not found in the root folder is requested,
  ## then the proxy passes the request to the upsteam (huginn unicorn).
  location @recipes {
    ## If you use HTTPS make sure you disable gzip compression
    ## to be safe against BREACH attack.
    # gzip off;

    proxy_read_timeout      300;
    proxy_connect_timeout   300;
    proxy_redirect          off;

    proxy_set_header    Host                $http_host;
    proxy_set_header    X-Real-IP           $remote_addr;
    proxy_set_header    X-Forwarded-For     $proxy_add_x_forwarded_for;
    proxy_set_header    X-Forwarded-Proto   $scheme;
    proxy_set_header    X-Frame-Options     SAMEORIGIN;

    proxy_pass http://recipes;
  }

  ## Enable gzip compression as per rails guide:
  ## http://guides.rubyonrails.org/asset_pipeline.html#gzip-compression
  ## WARNING: If you are using relative urls remove the block below
  ## See config/application.rb under "Relative url support" for the list of
  ## other files that need to be changed for relative url support
  location ~ ^/(assets)/ {
    root /home/deploy/recipes/public;
    gzip_static on; # to serve pre-gzipped version
    expires max;
    add_header Cache-Control public;
  }

  error_page 502 /502.html;
}
建立links:
sudo ln -s /etc/nginx/sites-available/recipes /etc/nginx/sites-enabled/recipes删除default:
sudo rm /etc/nginx/sites-enabled/default测试设置:
sudo nginx -t会弹出syntax is ok 和test is successful的信息,终端运行:
sudo service nginx restart
最后的效果:
「终于出来了,太不容易了……」
P.S
如果sudo service nginx restart没有任何反应,可以检查以下路径的log:
cd /var/log/nginx
cd recipes/log
参考
How To Deploy a Rails App with Unicorn and Nginx on Ubuntu 14.04
Use Unicorn and Nginx to Configure Ruby on Rails Applications on Ubuntu 14.04